August 17
The conversion parts arrived today from Kennedy Engineered Products.
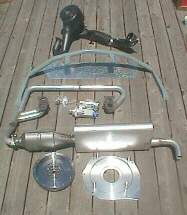 |
What we have here, starting at the top is: the Air Duct with filter housing. The engine mount (laying upside down on my deck). Under it is the muffler heat shield which is a flat sheet of galvanized metal. Next, the exhaust header. The geared starter is between the engine exhaust port faces. Then the catalytic converter, muffler and tail pipe. At the bottom, on the left, is the new flywheel and to the right, the adapter plate.
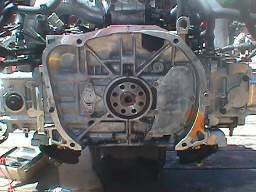 |
Here is the back of the Subaru engine with the crankshaft stub showing in the middle.
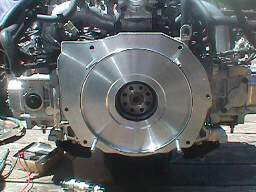 |
Here is the adapter plate set in place.
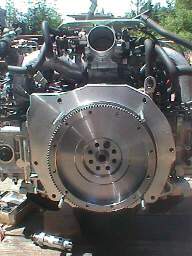 |
And here is the new flywheel set in place.
When I picked up the adapter kit and brought it home I was wondering when I should actually start removing the old VW engine and begin making the leap to Subaru power. This afternoon I had to run to town to pick up my mail and when I returned, about one quarter mile from home, steam started coming out of the vents on either side of the bus! Lights started coming on on my dash! Oh. Oh.
I coasted on home and checked it out. The VW water pump shaft had blown it's seal and coolant was flying everywhere!
Well! I guess now is the time!
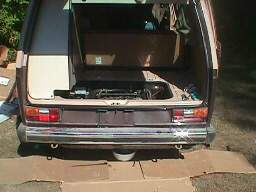 |
I backed the bus up by my deck and started removing the old VW engine. Removing the outer CV joints on a later model bus sure is a pain in the... neck! because there is a stamped metal box enclosing the outer CV joints! The stamped metal box is the bottom support for the coil springs. Putting the half-shafts back in will even be worse. There is hardly enough room for an allen wrench, half shaft, flashlight and eyeball!
(In hind site I don't think I would have had to remove the outer CV joints, just undo the CV joints at the transmission and wire the half shafts up out of the way.)
Anyway, engine removal has commenced.
August 19
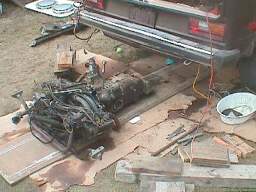 |
Here is the VW engine and transaxle pulled out from under the bus.
 |
I temporally installed the new engine mount using the four existing bolts and then drilled new holes for an additional bolt on each side, per instructions.
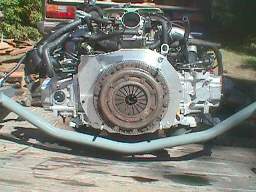 |
Then I removed the engine mount from the bus and installed it on the Subaru engine motor mounts. In this image you can also see that the clutch plate and pressure plate have been installed.
Next will be the mating of the transaxle to the Subaru engine and then hoisting the whole works back up into the bus...
Click here for the continuing story.
Click here to return to the bus conversion page.